I was so honored to be included in this hangout! Join ME, several of my lovely associates, and our awesome CEO as we share with you our AMAZING and baby-friendly catalog of products.
Are you aware of all of the dangerous chemicals you’re loading onto and into your babies on a daily basis? GOOD NEWS – There is an alternative!!!
*around 30 minutes listen for a top secret reveal that is yet to be released!*
Today is my son’s 1st birthday so I thought I’d share with you a project I’m working on…
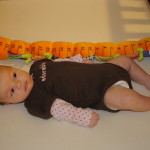
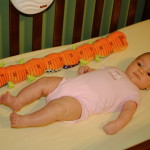
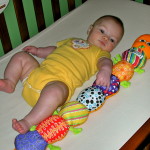
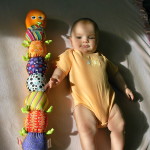
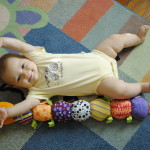
For each of my kids, I chose a unique stuffed toy for them to pose with in their monthly pictures. As parents, sometimes it’s difficult for us to see the all of the slight changes as our babies grow through their 1st year. For me, this was a good reminder to stop and take note of how my babies were changing month to month.
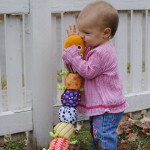
Here are the monthly pics for my daughter’s 1st year (Warning: I am not a great photographer):
We made an iPhoto book with the pictures. Each monthly pic started a new chapter filled with special events and pictures from that month.
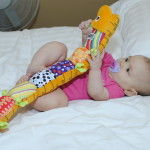
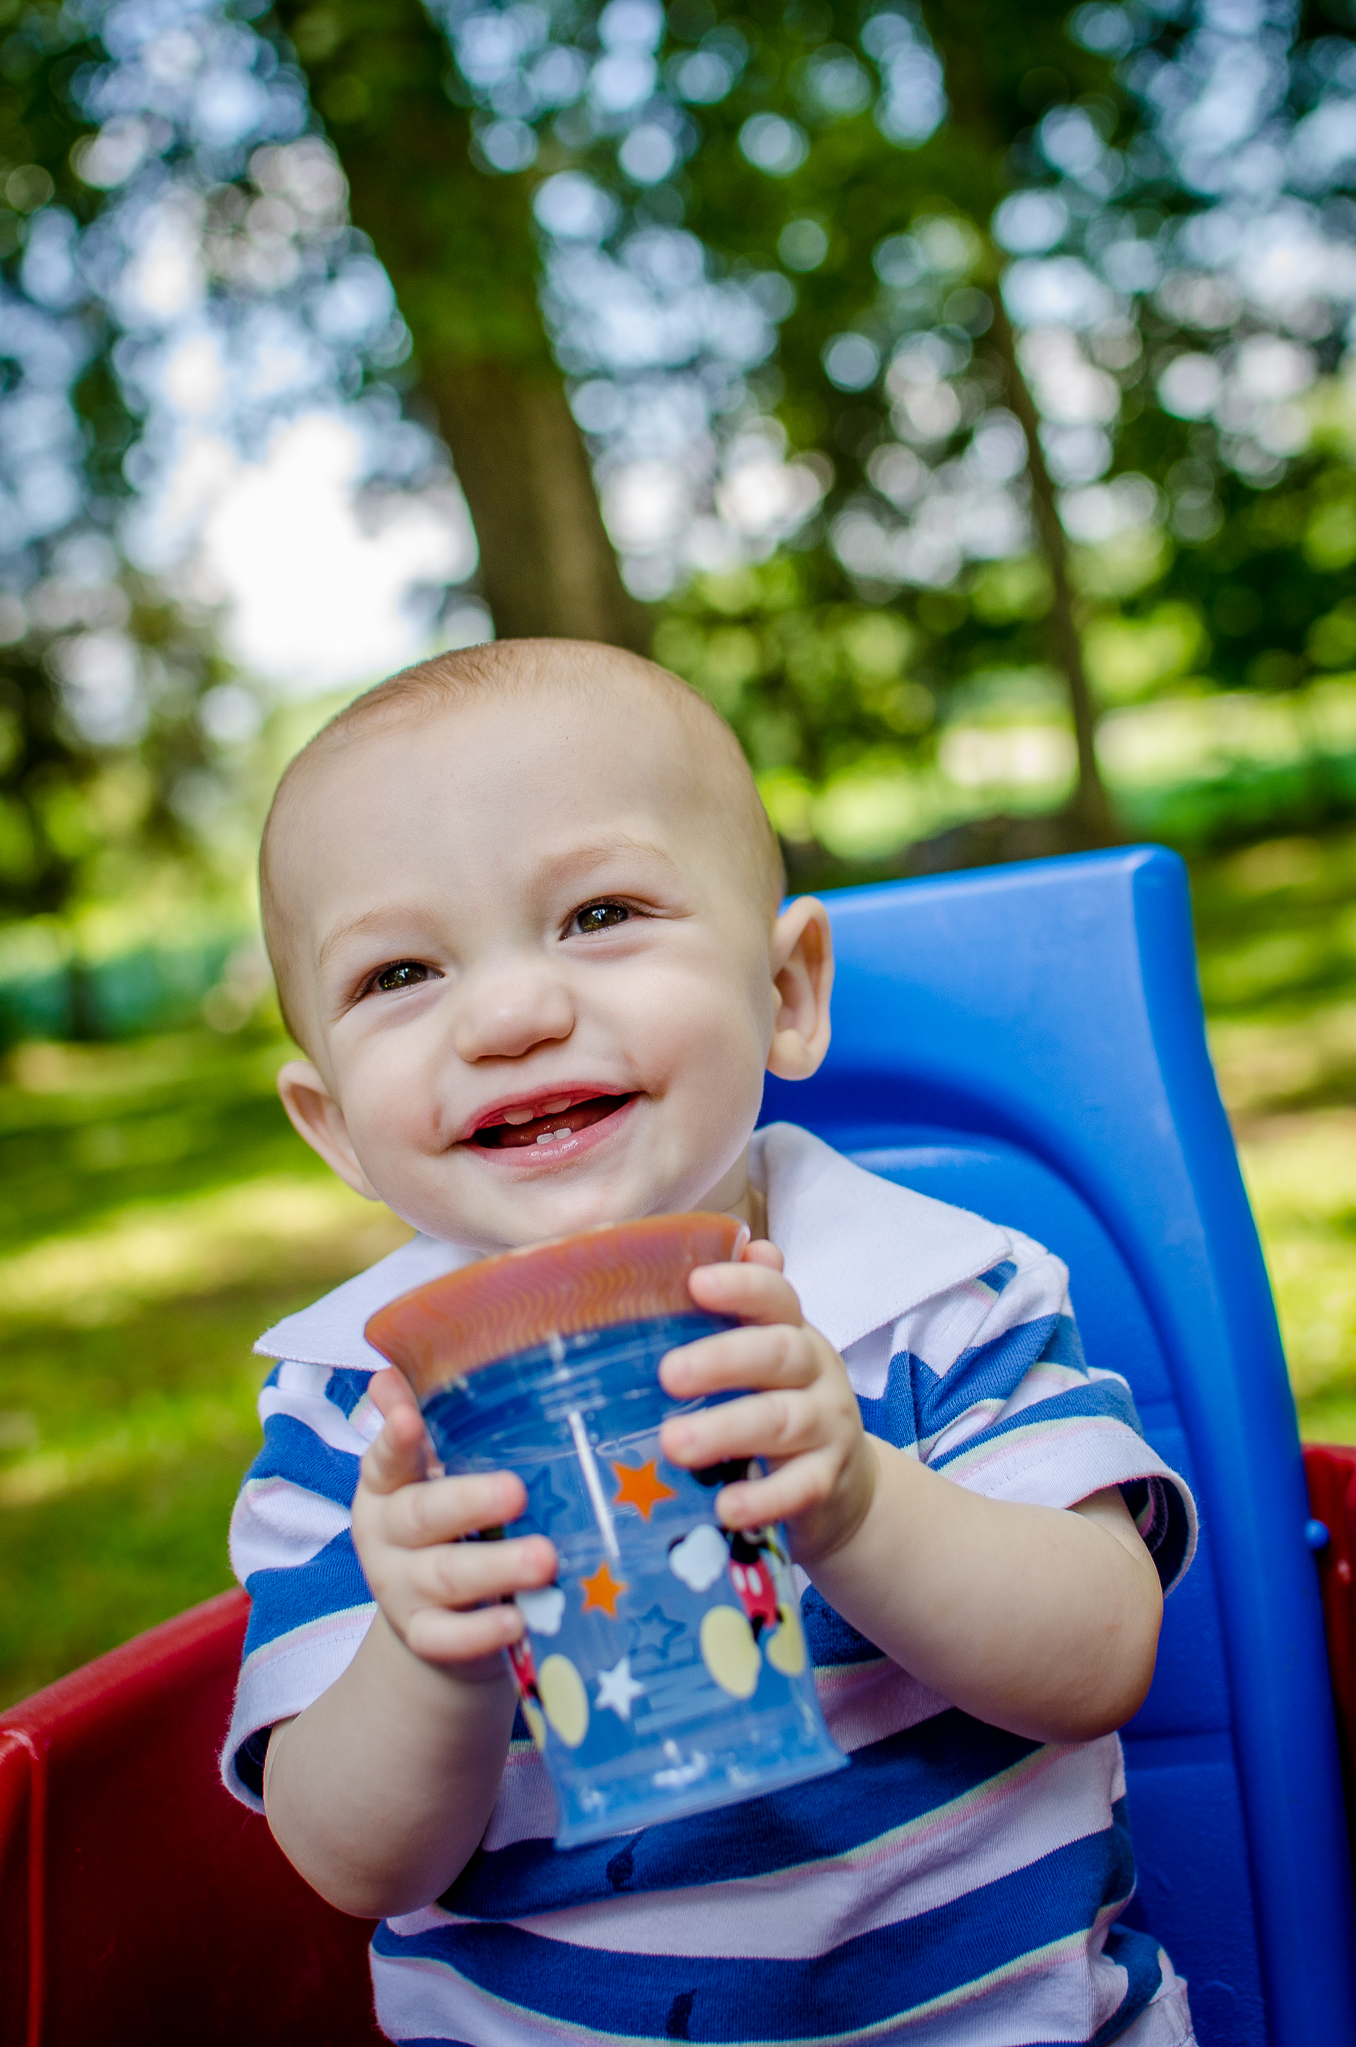
For the second baby we chose a more interactive toy with sentimental value…live and learn:
(I’m honestly not sure what I’ll make for my son to chronicle his 1st year…but I’m open to suggestions…hint, hint)
Obviously, I still have a lot more work to do on the second album, but I wanted to show you how unique the pics could be with a different child and toy. (I’ll try to replace the second album when I have a more complete version)
My daughter, the laid back one, was happy to stretch out next to her inch worm. My son, the non-stop mover, needed a toy he could play with. It’s kinda neat to look back and see so much of their personality even in those early months.
Here are a few of my tips for surviving and sticking with this year long project…
Chose a toy that is sentimental.
Try not to worry about the perfect pose.
Let your baby interact with the toy.
Set monthly reminders on your phone…the date will sneak up on you.
Don’t worry if you miss the exact day. Leave yourself a week window to get the pic when baby is “in the mood”.
Make the pics and end project individual for each child.
Have fun with it!!!
A dear friend of mine is from Ukraine and she and her husband primarily speak Russian in their home. Since her children are close in age to my own (and we enjoy the same vintage of red wine), we have frequent play dates. As a nerdy Speech-Language Pathologist mama, I can’t even begin to tell you how cool it has been to watch my daughter and her son play as they were both learning to communicate. My daughter spoke English and he a mixture of tones and sounds with some words tossed in here and there. As a mom I had no idea what they were “talking” about, but they never seemed to miss a beat in their communication.
As I began to research for this post, I realized how truly remarkable their early communication really was.
An article on LiveScience.com entitled How Bilingual Babies Keep Languages Separate, reported that “bilingual tots use qualities like pitch and duration of sounds to keep two languages separate”.
Studies show that infants and toddlers who grow up in bilingual homes often mix the two languages they hear in their home. Even babbling babies have been noted to babble differently according to the language of their communication partner (Johnstone, 2004). This is called code-switching.
Check out this amazing video of a baby using German with Papa until the moment he sees his Mama and switches to Japanese.
Ganishi (1975) found that 4 to 6-year old children consistently applied the situational rule that they speak the language their listener knew best. Other studies have noted this code-switching as early as 3 years old!
Researchers found that at 6 months, infants who were raised in a single language home could tell the difference between spoken sounds, whether they were spoken in the language the infants were used to hearing or in another language not spoken in their homes. By 10 to 12 months, however, the babies from single language homes were no longer detecting sounds in the second language, only in the language they usually heard.
The bilingual infants developed differently. At 6 to 9 months, they did not recognize the differences in spoken sounds in either language, but at 10 to 12 months — they were able to tell the difference between sounds in both languages.
“…babies born to bilingual mothers not only prefer both of those languages over others — but are also able to register that the two languages are different.”
“bilingual children develop crucial skills in addition to their double vocabularies, learning different ways to solve logic problems or to handle multitasking, skills that are often considered part of the brain’s so-called executive function [i.e. planning, working memory, attention, problem solving, etc].”
bilingual babies are “more cognitively flexible”
So what about kids from homes where only one language is spoken?
How can we help our kids stay “cognitively flexible” like the babies from bilingual homes?
Here are some of the key concepts and quotes from that article:
“During the first six months of life, babies babble using 70 sounds that make up all the languages in the world.”
“…during the first few years of life, children form their main learning pathways in the brain.”
The ideal time to learn a 2nd language is the between ages of 3 and 4
Learning a language is natural for children through play and exploration
“Children growing up in a well-rounded environment learn to speak at least 2,000 basic words by the time they are four years old.”
“…learning a second language [in the preschool years] is as easy as learning the first.”
A child’s brain is a “super-sponge” up to the age of 12
The other day I noticed some unfamiliar sounds coming from my daughter’s iPad. When I asked her what she was watching, she replied, “The Little Mermaid”. Baffled, I took a look for myself. Sure enough, she was watching The Little Mermaid…in Russian!
There are tons of resources to expose children to other languages. There are bilingual children’s books, videos, play dates with bilingual families, and even some preschools incorporate an introduction to a second language in their curriculum.
In our home, we practice counting in other languages while friends and family expose my children to other languages and cultures. My mother-in-law is from Vietnam and happily teaches the kids important words and phrases in Vietnamese when she visits. My dad picked up a few words and phrases in German and French while traveling for work and incorporates them into playtime. It’s just that simple.
Learning another language doesn’t need to be a structured daily exercise. When kids are young, their brains are like little sponges. Take advantage of every opportunity provide them a well-rounded environment for learning. Perhaps you may even learn a second language yourself alongside your child! They may not become fluent in a second language by the age of 3, but you will be helping them maintain their “cognitive flexibility” and laying a solid groundwork for them to learn another language when they are ready.
Do you speak more than one language in your home? If not, are you teaching your kids a second language?
References:
Genishi, C. S., (1976). Rules for Code-Switching in Young Spanish-English Speakers: An Exploratory Study of Language Socialization. Dissertation.
[follow_me]
I’ve been getting a lot of questions lately about sippy cups. So here’s my 2 cents…
As a Speech-Language Pathologist (SLP),
I have been taught to avoid sippy cups all together. The reason behind this instruction is based on the forward positioning of the child’s tongue when drinking from a sippy cup. This positioning, over time, may prompt some children to develop sound substitutions or a lateral lisp. This same argument often encourages weaning from the pacifier, bottle, and breast (ugh, I know, but stick with me) around the age of one.
Research suggests that children who use sippy cups may substitute /t/ for /k/, /d/ for /g/, -th- for /s/ or /z/ due to the forward tongue placement used when suckling.
For this reason, many SLPs recommend weaning from the nipple directly to a straw which utilizes a sucking pattern rather than suckling.
As a Certified Lactation Counselor (CLC),
I am a believer in extended breastfeeding, WAY beyond the child’s 1st birthday whenever possible. When a child breastfeeds or suckles, his tongue should extend over his lower incisors. This tongue placement is what saves mom from having her nipple chewed off during a good latch. Could this instinctual and natural motor pattern cause speech problems?
Babies all over the world breastfeed to an average age of 4.2 years. The majority of these children do NOT demonstrate lisps or sound substitutions.
As a mom,
I want my child to learn to drink from a cup that doesn’t spill, is easy to clean, and promotes his independence. I also want my child to transition from breast to cup and back to breast until HE is ready to wean.
So… What’s the answer?
First we must understand the difference between suckling and sucking.
In a suckle pattern, the primary movement is extend and retract. The tongue does not extend beyond the lips, remains flat and thin, and does not move laterally. Jaw opening and closing occur in conjunction with tongue movement. It’s rhythmical.
In a sucking pattern, the primary movement is up and down. The tongue is still contained within the mouth and remains flat and thin, but the tip elevates to the anterior hard palate. The movement is rhythmical, up-down cycles.
So where does this leave us in regards to the theory that extended use of the suckling pattern can lead to speech development delays?
One study showed that extended use of suckling outside of breastfeeding may have harmful effects on speech development in young children (Barbosa 2009).
Another study suggested breastfeeding may protect against language and motor skill delays in young children (Dee 2007).
“In addition to several benefits of breastfeeding, it contributes to a proper oral motor development and also avoids speech-language disorders, regarding oral motor system.” (Neiva 2003)
In a study at Aarhus University Hospital in Denmark, early language development was defined as “the ability to babble in polysyllables”. The research found that “the proportion of infants who mastered the specific milestones increased consistently with increasing duration of breastfeeding” (Vestergaard 1999).
“A positive correlation was found between duration of breast feeding and performance in tests of vocabulary and visuomotor co-ordination, behaviour score, and measurements of height and head circumference…Breast feeding had no discernable effect on speech problems during the first five years.” (Taylor 1984)
“There is another compelling benefit to exclusive breastfeeding: positive effects on the development of an infant’s oral cavity, including improved shaping of the hard palate resulting in proper alignment of teeth and fewer problems with malocclusions. The purpose of this commentary is to stimulate further research as well as to propose the importance of breastfeeding to developing and maintaining the physiologic integrity of the oral cavity…Having in mind that early weaning brings consequences to oral motor development, occlusion, breathing, and to children’s oral motor aspects, we have to emphasize the importance of breastfeeding. The encouragement of this practice and the proper sucking pattern is the basis for the prevention of speech-language disorders, as far as the oral motor system is concerned.” (Palmer 1998)
Now that we’ve ruled out extended breastfeeding as a contributor to speech delays and oral motor deficits, let’s discuss the options for teaching your child to drink from a cup…
Sippy Cup: A cup with a spout on the lid that can be soft or hard. There is usually a valve mechanism to prevent spills that can be removed for cleaning (good luck with that). The issue with these cups is that a child suckles the spout much like they would a pacifier or bottle which can prevent the tongue from moving into a more natural position for speech development (Remember the difference between suckle and suck?).
Straw Cup: A cup, lid, straw set with an anti-spill valve located in the straw or lid. These are a MAJOR pain to clean and are prone to grow all sorts of lovely bacteria. A straw cup promotes sucking, strengthens cheek and lip muscles, and develops a new motor pattern in your little one. The straws are also fun to chew on…BEWARE, this new knowledge may cause some confusion and biting when breastfeeding. Personally, I recommend holding off on introducing a straw to your breastfed child until he is at least 12-18 months old.
Toddler Training Cup/ Rim Cup: A cup with a twists in/on lid. The valve system is in the lid itself to prevent spills. The baby sips on the cup rim with only a minimal amount of sucking required. Drinking from a cup rim promotes appropriate tongue positioning. Just make sure they are not supporting the cup with their tongue. Drinking from a training cup also encourages lip retraction or spreading and there is little to no confusion when returning to the breast. This is the option we use and have found the Sassy Grow Up Cup easy to clean with only 3 pieces.
Cup: As an SLP and CLC, I believe this to be the best possible option. As a mom, it’s a pain in the arse. Easy to clean, but unfortunately not spill proof. Drinking from a cup allows your child to set his own pace (when guided) and promotes an ideal tongue and jaw position and movement during drinking.
In a perfect world, we could take the time to cup train our children without worrying about spills or time restraints…In reality, we must do the best we can.
Babies and children don’t need to drink every moment of every day. In fact, carrying around a cup all day may contribute to early weaning due to your child beginning to seek comfort in the cup rather than breastfeeding. I recommend keeping a spill proof cup in the diaper bag for meals on the go and rehydration during play, but restrict at home drinking to the kitchen from a cup rim whenever possible. Spills happen, but they’re easier to prevent and contain if monitored and restricted to one space.
*These are merely my thoughts on the matter. All children are different and what works for some, may not work for all. Many children develop persistent sound substitutions regardless of our best efforts and require speech therapy. If you are concerned about your child’s speech development, contact your pediatrician for a SLP consult.
The Baby K’tan Baby Carrier is a soft hybrid carrier that offers the ideal blend of a sling and wrap. Its innovative double-loop design allows mom or dad to wear baby in multiple positions, without any complicated wrapping or buckling! It is lightweight and compact, yet ergonomically designed to distribute baby’s weight across both shoulders. Retail value: $49.95. www.babyktan.com
[embedit snippet=”bk-rafflecopter”]
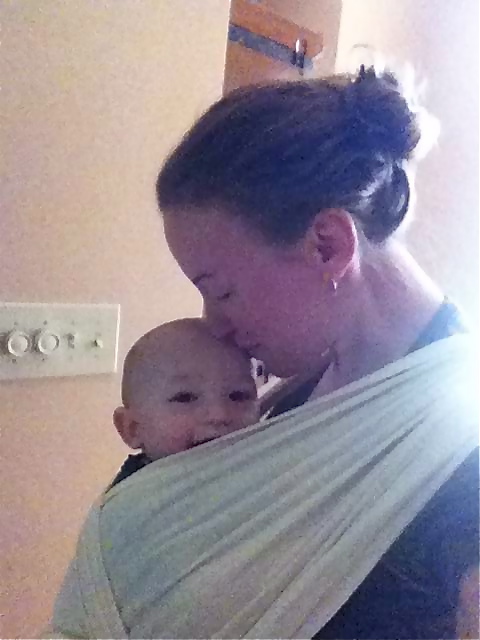
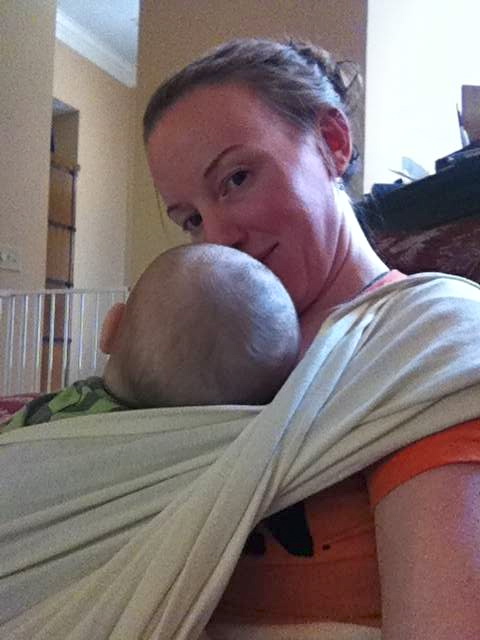
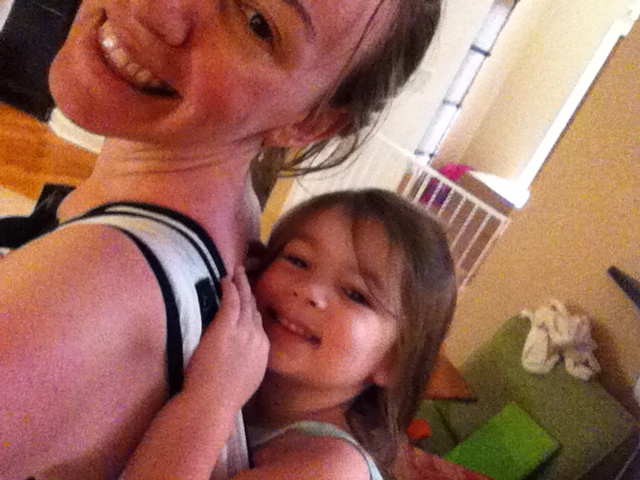
As I’ve mentioned in a previous post, it’s difficult for me to carry my babies unless I am wearing them. I have always been envious of those moms who snuggled with their babies in a simple wrap carrier, but wrapping and tying them one handed never seemed doable. I even tried a few slings, but have yet to find a comfortable option. Hence, I’ve always felt limited to soft structured carriers (SSC) like the Boba and Ergo.
Then…
I was introduced to the Baby K’tan while shopping at my local baby boutique, A Nurturing Moment. The owner, Glenni, is familiar with my need for adaptability and encouraged me to try the Baby K’tan with her weighted display doll to see if it might be an acceptable adaptable option.
After playing around with the doll in a few different carries, I decided the K’tan might be worthy of further review.
[embedit snippet=”baby-ktan”]
Little did I know, it would become one of my daily essentials!
Hug Position
My son is a snuggler and demands human contact most of the day and night. I love this about him…it’s so nice to feel needed. However, it means that blogging and keeping up with housework must often take a backseat.
I tried wearing him in one of my SSC’s around the house and it worked well, but it was difficult to get the timing right. It’s a bit cumbersome to wear a SSC all day while baby is playing or eating just to be able to quickly pop him in it when he starts to get fussy or show feeding cues. I found that if I waited until he was ready to be held before I put the carrier on, I’d just forgo the whole thing and end up sitting with him and my Boppy.
My Baby K’tan solved all of those issues. I can toss my K’tan around my neck at a moments notice. I’ve even worn it across my chest in preparation to grab baby and go when he starts working up a fuss. It’s about like wearing a scarf, lightweight and soft.
My son may still fuss a bit while getting situated, but no more waiting on mommy to get settled with my Boppy…oh, and my iPad…and I’ll need a water…and maybe a snack…and, crap, I better go pee first because he may sleep for hours.
The K’tan allows me to stay mobile and hands free while my son nurses and naps to his heart’s content.
So here’s the breakdown…
Ease of use:
There is a learning curve. The Baby K’tan consists of two large loops of fabric connected by a small loop and a separate sash. This can be a bit daunting for a mom who is new to babywearing. Luckily, Baby K’tan offers a free step by step guide with pictures and easy to follow instructions for each of the 6 positions. There are also how-to videos on the Baby K’tan YouTube channel, as well as, my adaptive videos below to help you get started.
Mommy Comfort:
The K’tan is super comfy. No buckles, no straps, and balanced weight distribution across your shoulders and back. For me and my 19 lb tank of a son, this is not my all day carrier. My back starts getting fatigued after a few hours even while sitting. However, if I had found this option when he was a newborn, I could see myself easily wearing him for full day outings. Also, as you’ll see below, I am able to comfortably and safely carry my 32 lb three and a half year old with my K’tan in the hip position. This can come in handy when we are out and about, as I can carry one and push the other in the stroller. A quick adaptive note, a good stroller can offer a bit extra balance and support while baby wearing on the go. I’ll discuss this at length another day, but thought I’d mention it here as well.
Baby Comfort:
I love, love, love this carrier for baby comfort. Baby is able to move and stretch against the fabric while still staying safe and cozy next to you.
My son has eczema that often flares behind his knees and this is the ONLY carrier we’ve tried that does not cause pressure and rub spots where his legs rest and meet the fabric.
Breastfeeding:
(I’m actually writing this section while nursing) We love breastfeeding in our Baby K’tan. The stretchy fabric snuggles him close and is lightweight and cool enough for baby to stay comfy. Initially, I was concerned that my Baby K’tan was going to carry him too high to comfortably nurse, but once he settled into the hug position breastfeeding was a breeze. I am able to nurse sitting or standing. Due to my right sided weakness, I could never dream of nursing standing without a carrier.
If modesty is your concern, nursing in public in your Baby K’tan can be very discrete…as you may note in one of the videos below.
The Downside:
Sizeability: You must buy the size that fits you so it can be difficult to share with another caregiver. On the flip side, this is the trade off for no straps or buckles…and sometimes it’s nice to have something in the house that you don’t have to share. 😉
Weight Distribution: I must watch my posture in this carrier. Unlike an SSG which places some of baby’s weight on your hips, the K’tan (and any other wrap or sling carrier) distributes baby’s weight throughout your shoulders and back. For this reason, my K’tan has become my at home and quick in and out errands carrier. It is ideal for doctor’s visits, managing baby between the car and shopping cart, and nursing in public.
The Positions:
Hug Position: My favorite for my little one. Ideal for breastfeeding.
Two-Hip Position: Good for shifting baby’s weight when fatigue is an issue.
Adventure Position: We’ve attempted this hold a few times, but my son is not a fan of facing out. Babywearers should use caution when wearing a baby forward facing because it can cause extra stress to the back and shoulders due to the way the baby’s weight is distributed and carried vs. the way it’s distributed when baby is snuggled close and “wrapped around” facing your body. It’s also important to remember to support the baby’s legs and hips when forward facing. Fortunately, the K’tan allows for this needed support by enabling the wearer to widen the base of the carrier/ fabric so that it cradles the child and gives full support to his hips and spine. See Owner’s Manual p.9
Explore Position: I prefer this position to the Adventure position, but my son is almost too large at 19lbs to pull it off.
The Adventure and Explore positions may be ideal for wheelchair users that need extra security holding their little one while using hands to ambulate their chair.
Hip Position: Great for hauling a larger child. I also use this position with my son for a quick assist, but it’s not entirely hands free and thus not ideal for this one-handed wearer.
Is it wrong to want another baby just so I can try the Newborn Kangaroo Position? 😉
With so many position options this carrier is ideal for adapting to the caregiver’s individual babywearing needs.
Baby K’tan helped me be gain independence through adaptive babywearing and I hope it will do the same for you!
In honor of Independence Day, I am offering one lucky winner a free Baby K’tan in your choice of size and color. The contest begins at midnight tonight (6/20/13) and will run through July 5th. Please share this post and submit your entries above. Good Luck!
Adaptive Baby Wearing
This part applies to all carriers…whatever works for you:
My tip for any mom with limited mobility or just new to baby wearing: Find a place to sit. It is 10x easier and safer getting a baby or toddler in carrier while seated. At home, I prefer the couch for extra wiggle room. When out and about, I get baby situated in the carrier while sitting in the car or on a park bench.
To unload your baby: Simply sit and lay baby in your lap or bend over a chair, car seat and gently lay baby down and slide him out of the carrier. Once baby is situated in his next destination (car seat, floor, Dad’s arms) take the carrier off.
As with all things adaptive, do whatever works for you. Every body is different. Find what adaptations work best for you and your baby. My goal is to demonstrate the adaptive possibilities of the carrier, the rest is up to you!
Disclosure: I received no compensation for this post. I purchased a Baby K’tan carrier at a discount for the purpose of this review. I was not required to give a positive review and all opinions are 100% my own. I only review products that I’ve found to be adaptable through personal experience or that I have researched and tried for the purpose of adaptive review. Amazon links are affiliate links.
For me, baby wearing is the equivalent of carrying my child. Secondary to my disability, I am unable to carry my kids “the old fashioned way” for any length of time simply because I need my only functional arm and hand for things like opening doors, getting a drink, picking a wedgie, wiping noses, and well, you get the point. Strength, balance, and endurance are also issues since I am only able to carry my kids on my left hip.
I’ve tried many different carriers with my kiddos over the years. After much trial and error, my go to carrier is a heavily padded performance Soft Structured Carrier (SSC) simply because of the extra security, comfort, and accessibility that it offers. However, it can be miserable to wear out during steamy southern summers. I was in need of an alternative solution for my clingy must-always-be-held baby boy.
After a bit of research, I decided to give the new BobaAir a try.
Here are a few of the features that attracted me:
Compact and self-storing: This carrier only weighs 0.7lbs and folds up into itself for easy storage…Just like that cool windbreaker I had in college!
Diversity: The BobaAir is a SSC that offers front and back carry and that is intended for children between 15-45lbs.
Durability: It is made of 100% Nylon and therefore easy to clean and extremely durable.
Sleeping Hood and Pocket: Like many SSCs, the BobaAir includes a sleeping hood and a large pocket to store your hood in when not in use. The hood can be used to protect your little one from sun or rain, or to provide a cover when they are nursing or taking a nap.
Sizeability: The BobaAir is designed to fit parents of all shapes and sizes. All straps are fully adjustable and have those handy little elastic bands so you can comfortably tuck the straps away once you have the carrier comfortably adjusted. AKA: MY HUSBAND CAN ALSO HELP CARRY THE LOAD!
The Trial:
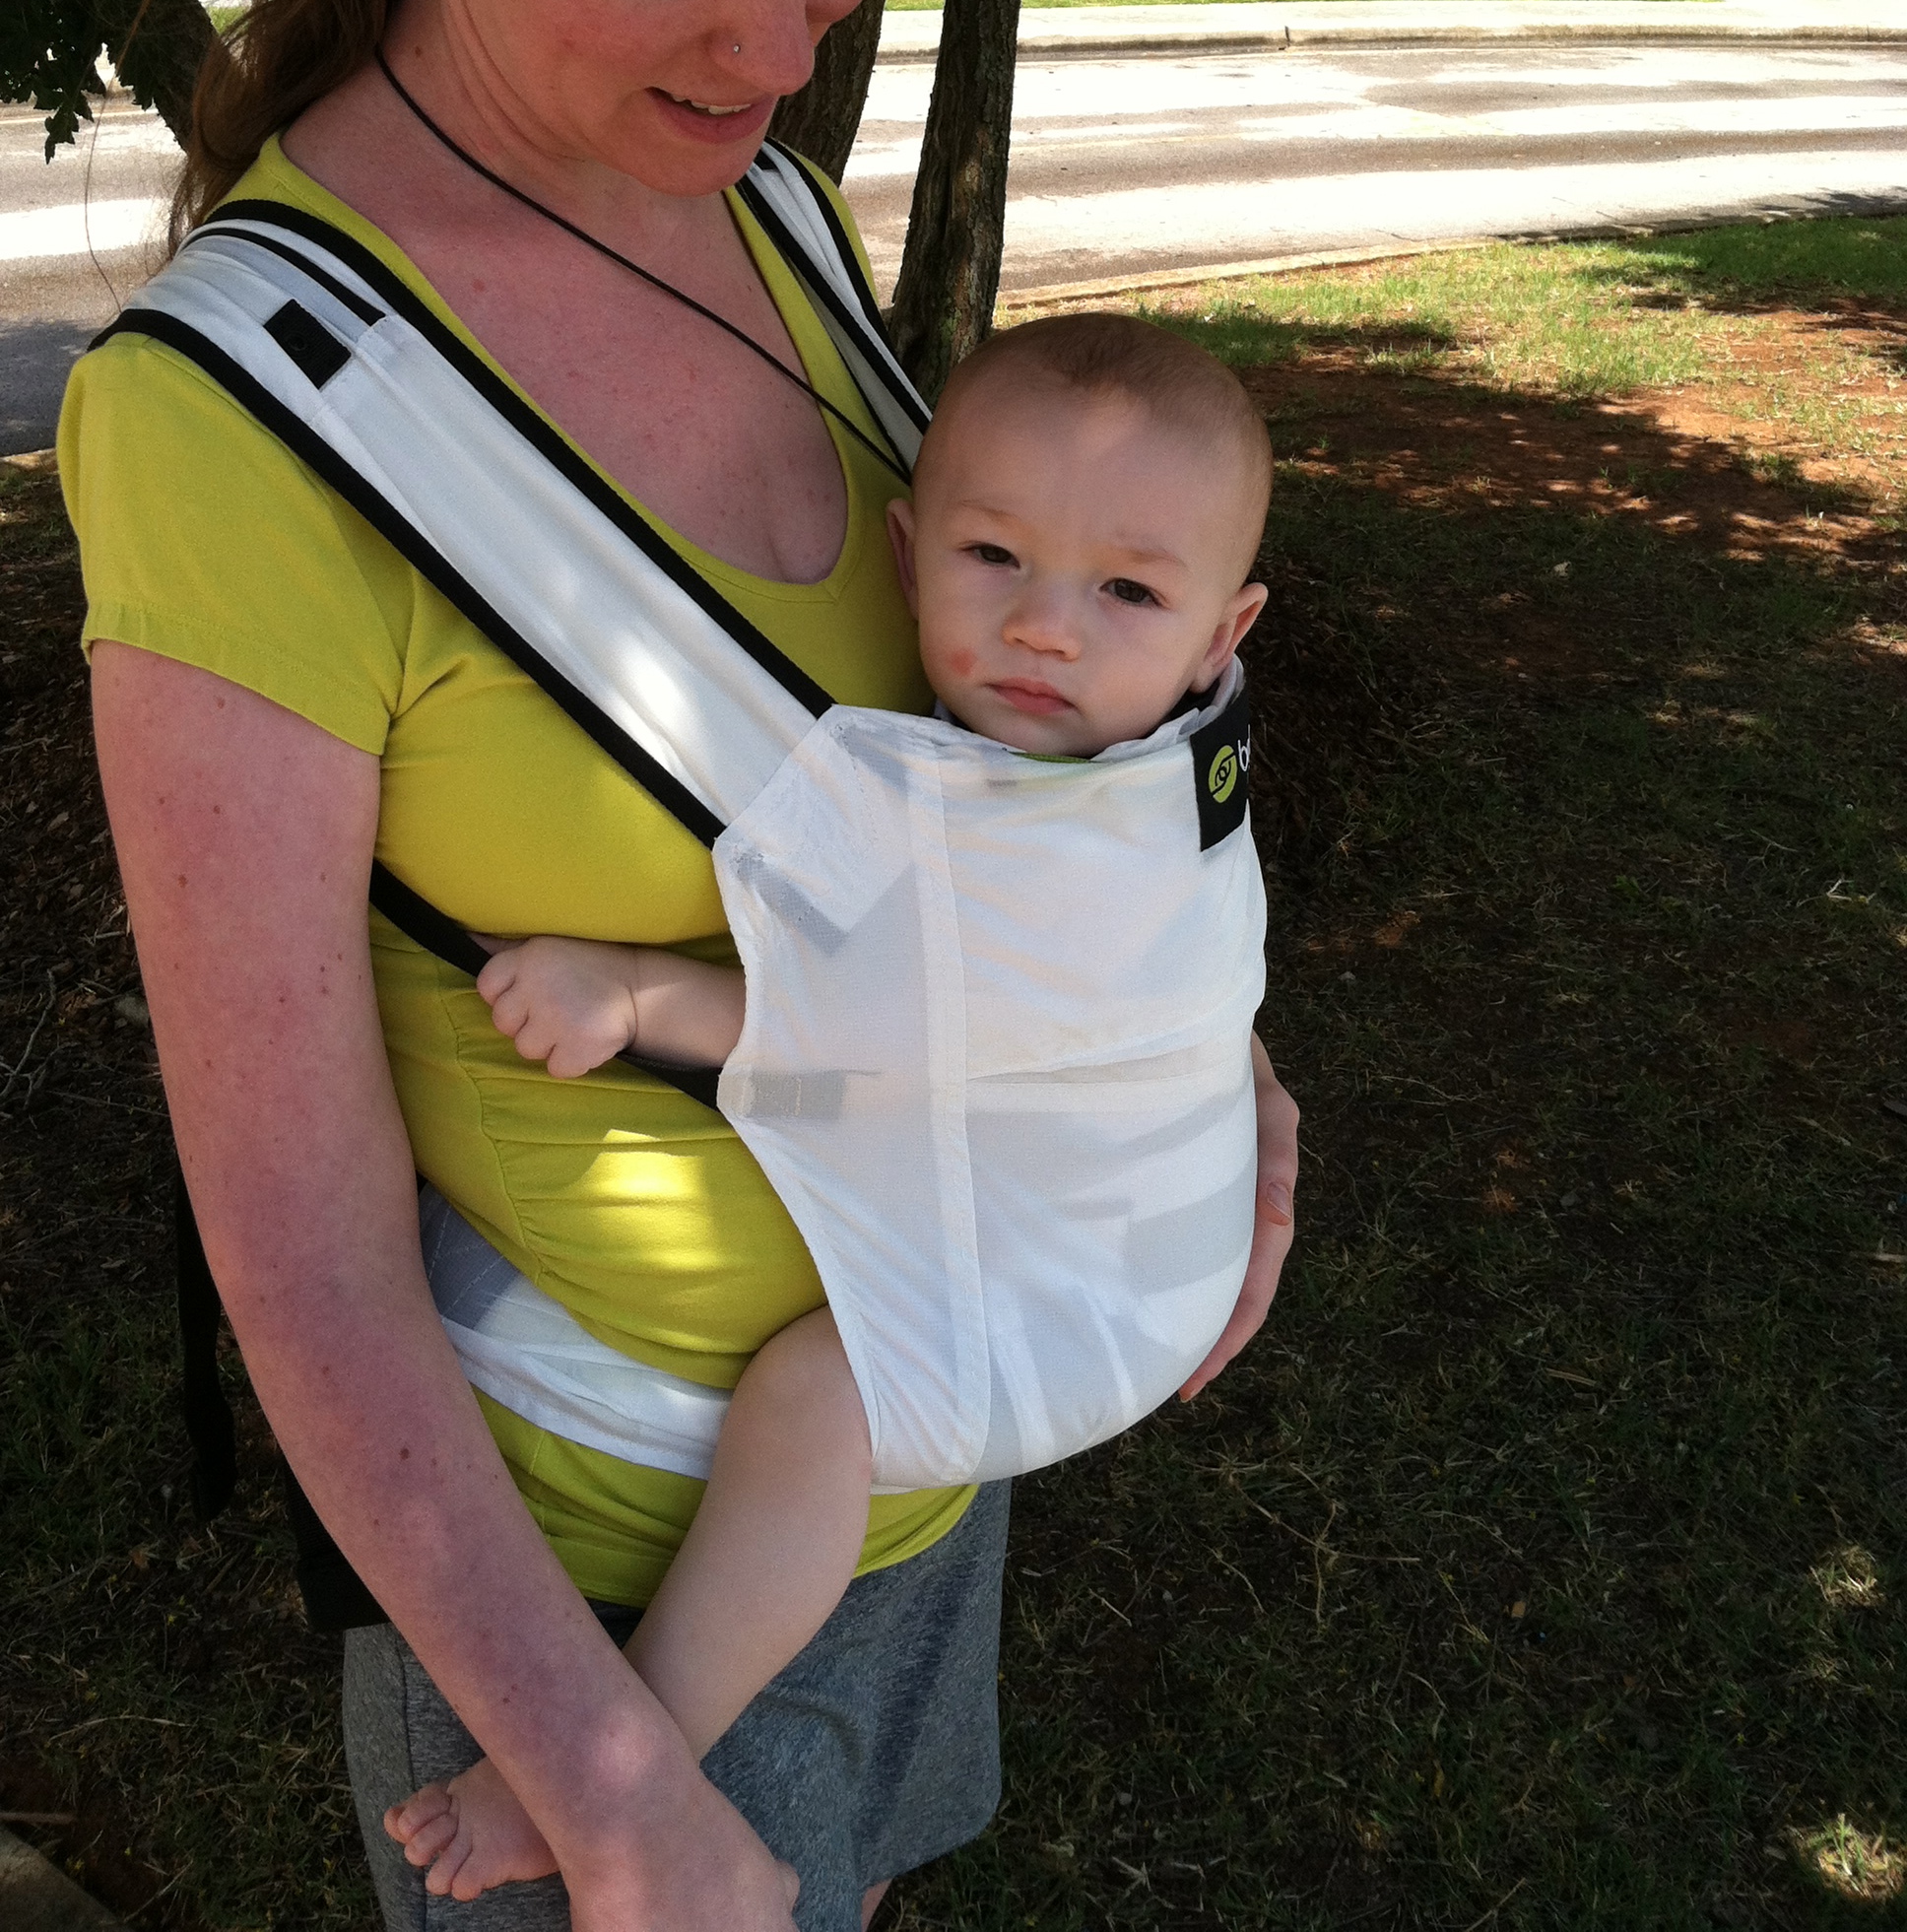
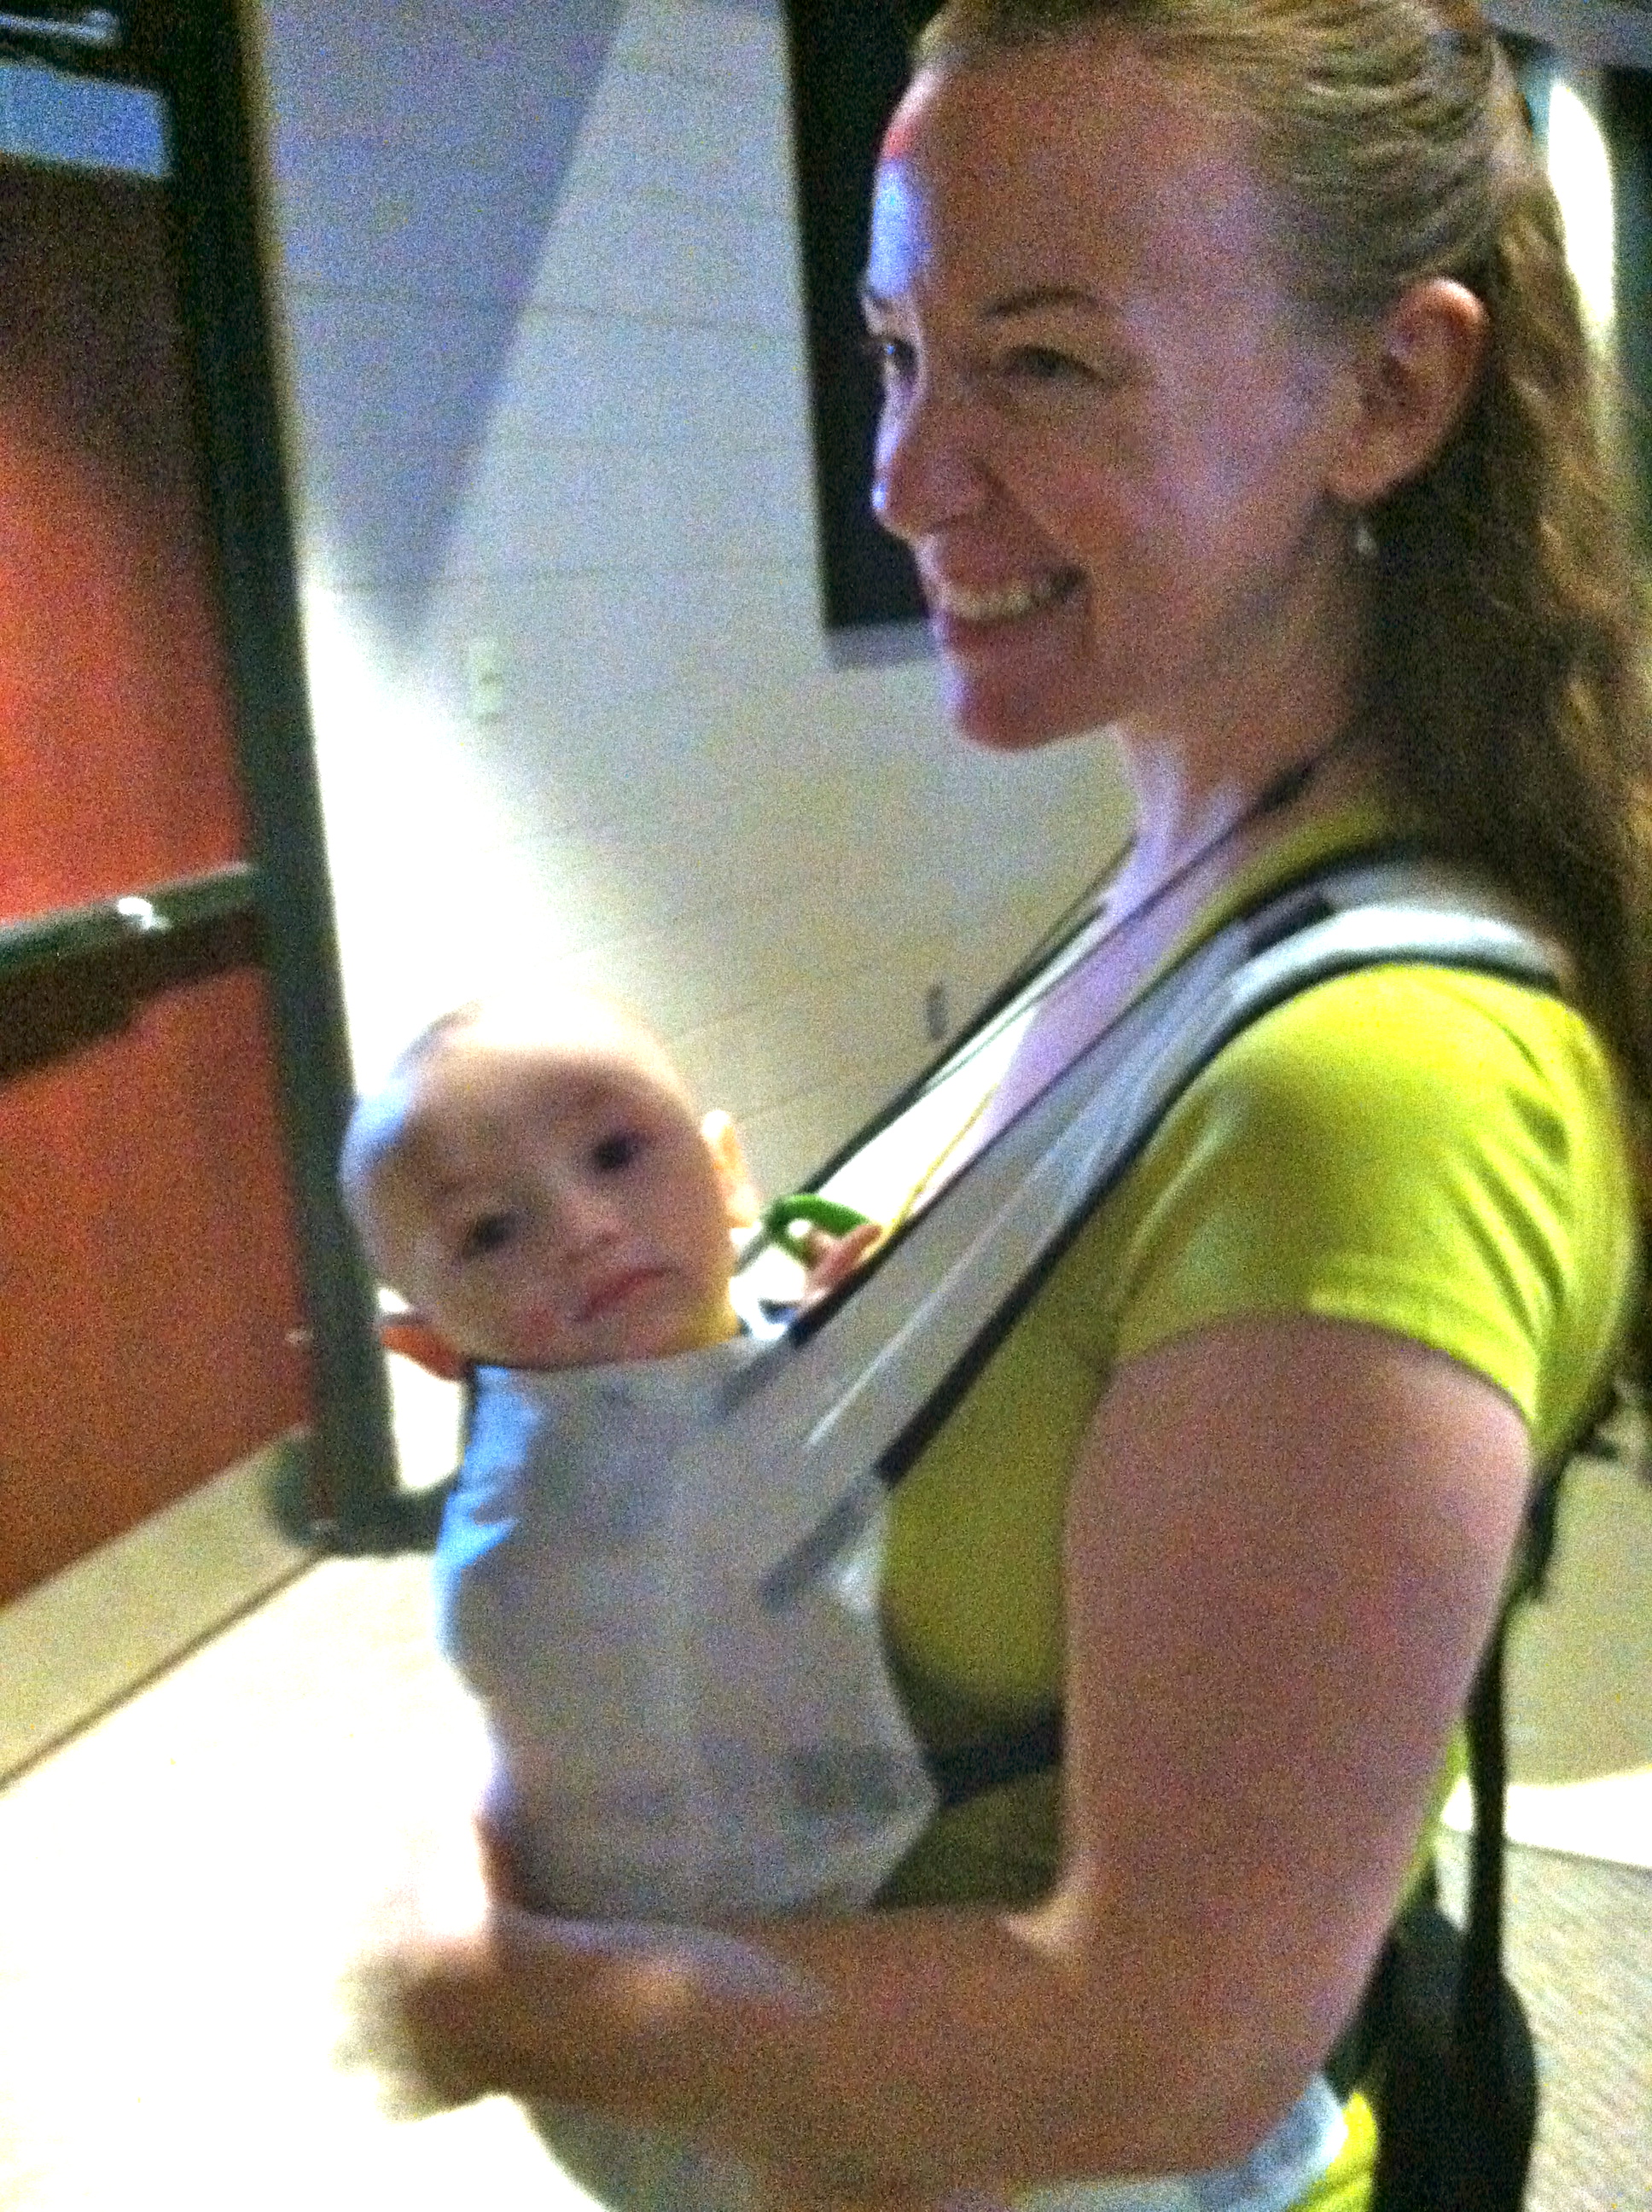
Our first BobaAir outing lasted about 2 hours, included some indoor/outdoor time, a lot of standing, a bit of walking, breastfeeding, and sitting whenever I needed a break.
Sizing and buckling were similar to that of my performance SSC and very accessible. In fact, the centered buckles (standard for Boba) may even be a bit easier to manage than other SSCs that have a static side and adjustable side usually making them right handed.
The minimalist BobaAir actually made wearing my 19lb son a bit easier since the carrier itself weighs virtually nothing. As far as adaptability, this is an EXCELLENT feature!
Usually, after wearing my son for any length of time in my heavier SSC, our shirts will be damp with sweat and I worry about him becoming overheated. After 2 hours in the BobaAir, our shirts were dry and my son was cool as a cucumber.
The BobaAir really IS cooler.
Mommy Comfort:
Initially, I was a bit skeptical of this carrier due to the lack of padding. However, once adjusted correctly, I found the BobaAir almost as comfortable as my go-to padded soft carrier.
My right-sided weakness means very little natural padding through my right shoulder and I found myself adjusting the shoulder strap around my boney collarbone multiple times. Fortunately, this can easily be remedied by using an extra teething pad or doubled piece of cloth as a shoulder pad when needed.
Baby comfort:
My son was definitely cooler, but there is a tradeoff. With no padding, the backs of his legs and behind his knees had some pressure marks. The marks quickly faded once out of the carrier and no raw spots were noted.
On that note, let me mention the eczema perspective for a moment. As any eczema mom knows, heat is a big issue. I would most definitely recommend this carrier for it’s lightweight properties. However, be warned that the nylon, although cool, is not very soft. I would recommend putting baby in lightweight clothing that covers his/her highly prone eczema hot spots to protect from rubbing irritation, but you probably already do that anyway, right?
Breastfeeding:
The BobaAir is a dream for breastfeeding mums. Without any padding to get in the way, the breathable nylon keeps baby cool and ready to nurse. I will say that the “sleeping hood” falls a bit short as a nursing cover as compared to my other SSC, but I think the benefits far out weigh this one minor infraction.
Summary:
Despite the BobaAir’s minimalist appearance, I am able to carry my 19lb son comfortably for limited intervals. This is not an all day carrier. I will continue to use it for summer outings, church, and travel and I believe it will be ideal for flying.
As an added bonus, I was also able to give my 33lb daughter a piggyback ride for the VERY 1st TIME! That single experience put this carrier near the top of my list.
*A word of caution when using this carrier, if you are having trouble getting the straps adjusted comfortably CALL BOBA. Their customer service is excellent and ready to help. Initially, I spent 3 days playing around with my BobaAir trying to get everything comfortably situated. Come to find out that my carrier was defective. Total fluke! If I’d just called Boba to begin with, I may have realized this before I subjected my son and self to so much frustration. Once I contacted Boba to discuss my concerns, I had a replacement BobaAir within 48 hrs as well as a shipping label to return my 1st carrier free of charge to Boba. They assured me that they would be examining the defective carrier to remedy potential future issues. My replacement carrier adjusted quickly and comfortably on the 1st try.
Adaptive Baby Wearing
This part applies to all carriers…whatever works for you:
My tip for any mom with limited mobility or just new to baby wearing: Find a place to sit. It is 10x easier and safer getting a baby or toddler in carrier while seated. At home, I prefer the couch for extra wiggle room. When out and about, I get baby situated in the carrier while sitting in the car or on a park bench. Just fasten and adjust the belt before getting baby out of his car seat or stroller.
To unload your baby: Simply bend over a chair, car seat, or bed, unbuckle my chest strap, and gently lay baby down and slide him out of the carrier. Once baby is situated in his next destination (car seat, floor, Dad’s arms) take the carrier off and tuck it back into itself.
To unload your toddler: Find a deep enough seat for you both to sit and carefully let her out of the carrier.
As with all things adaptive, do whatever works for you. Every body is different. Find what adaptations work best for you.
How have you adapted baby wearing to fit your needs?
Disclosure: I received no compensation for this post. I was provided a BobaAir for the purposes of this review. I was not required to give a positive review and all opinions are 100% my own.
I only review products that I’ve found to be adaptable through personal experience or that I have researched and tried for the purpose of adaptive review.
Amazon links are affiliate links.
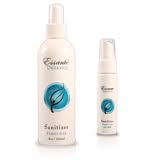
I know I’ve mentioned this product before, but there are just so many reasons to love Essante Sanitizer.
As you guys know, I love playing around with cloth diapers and the endless combinations one can create with the right pieces.
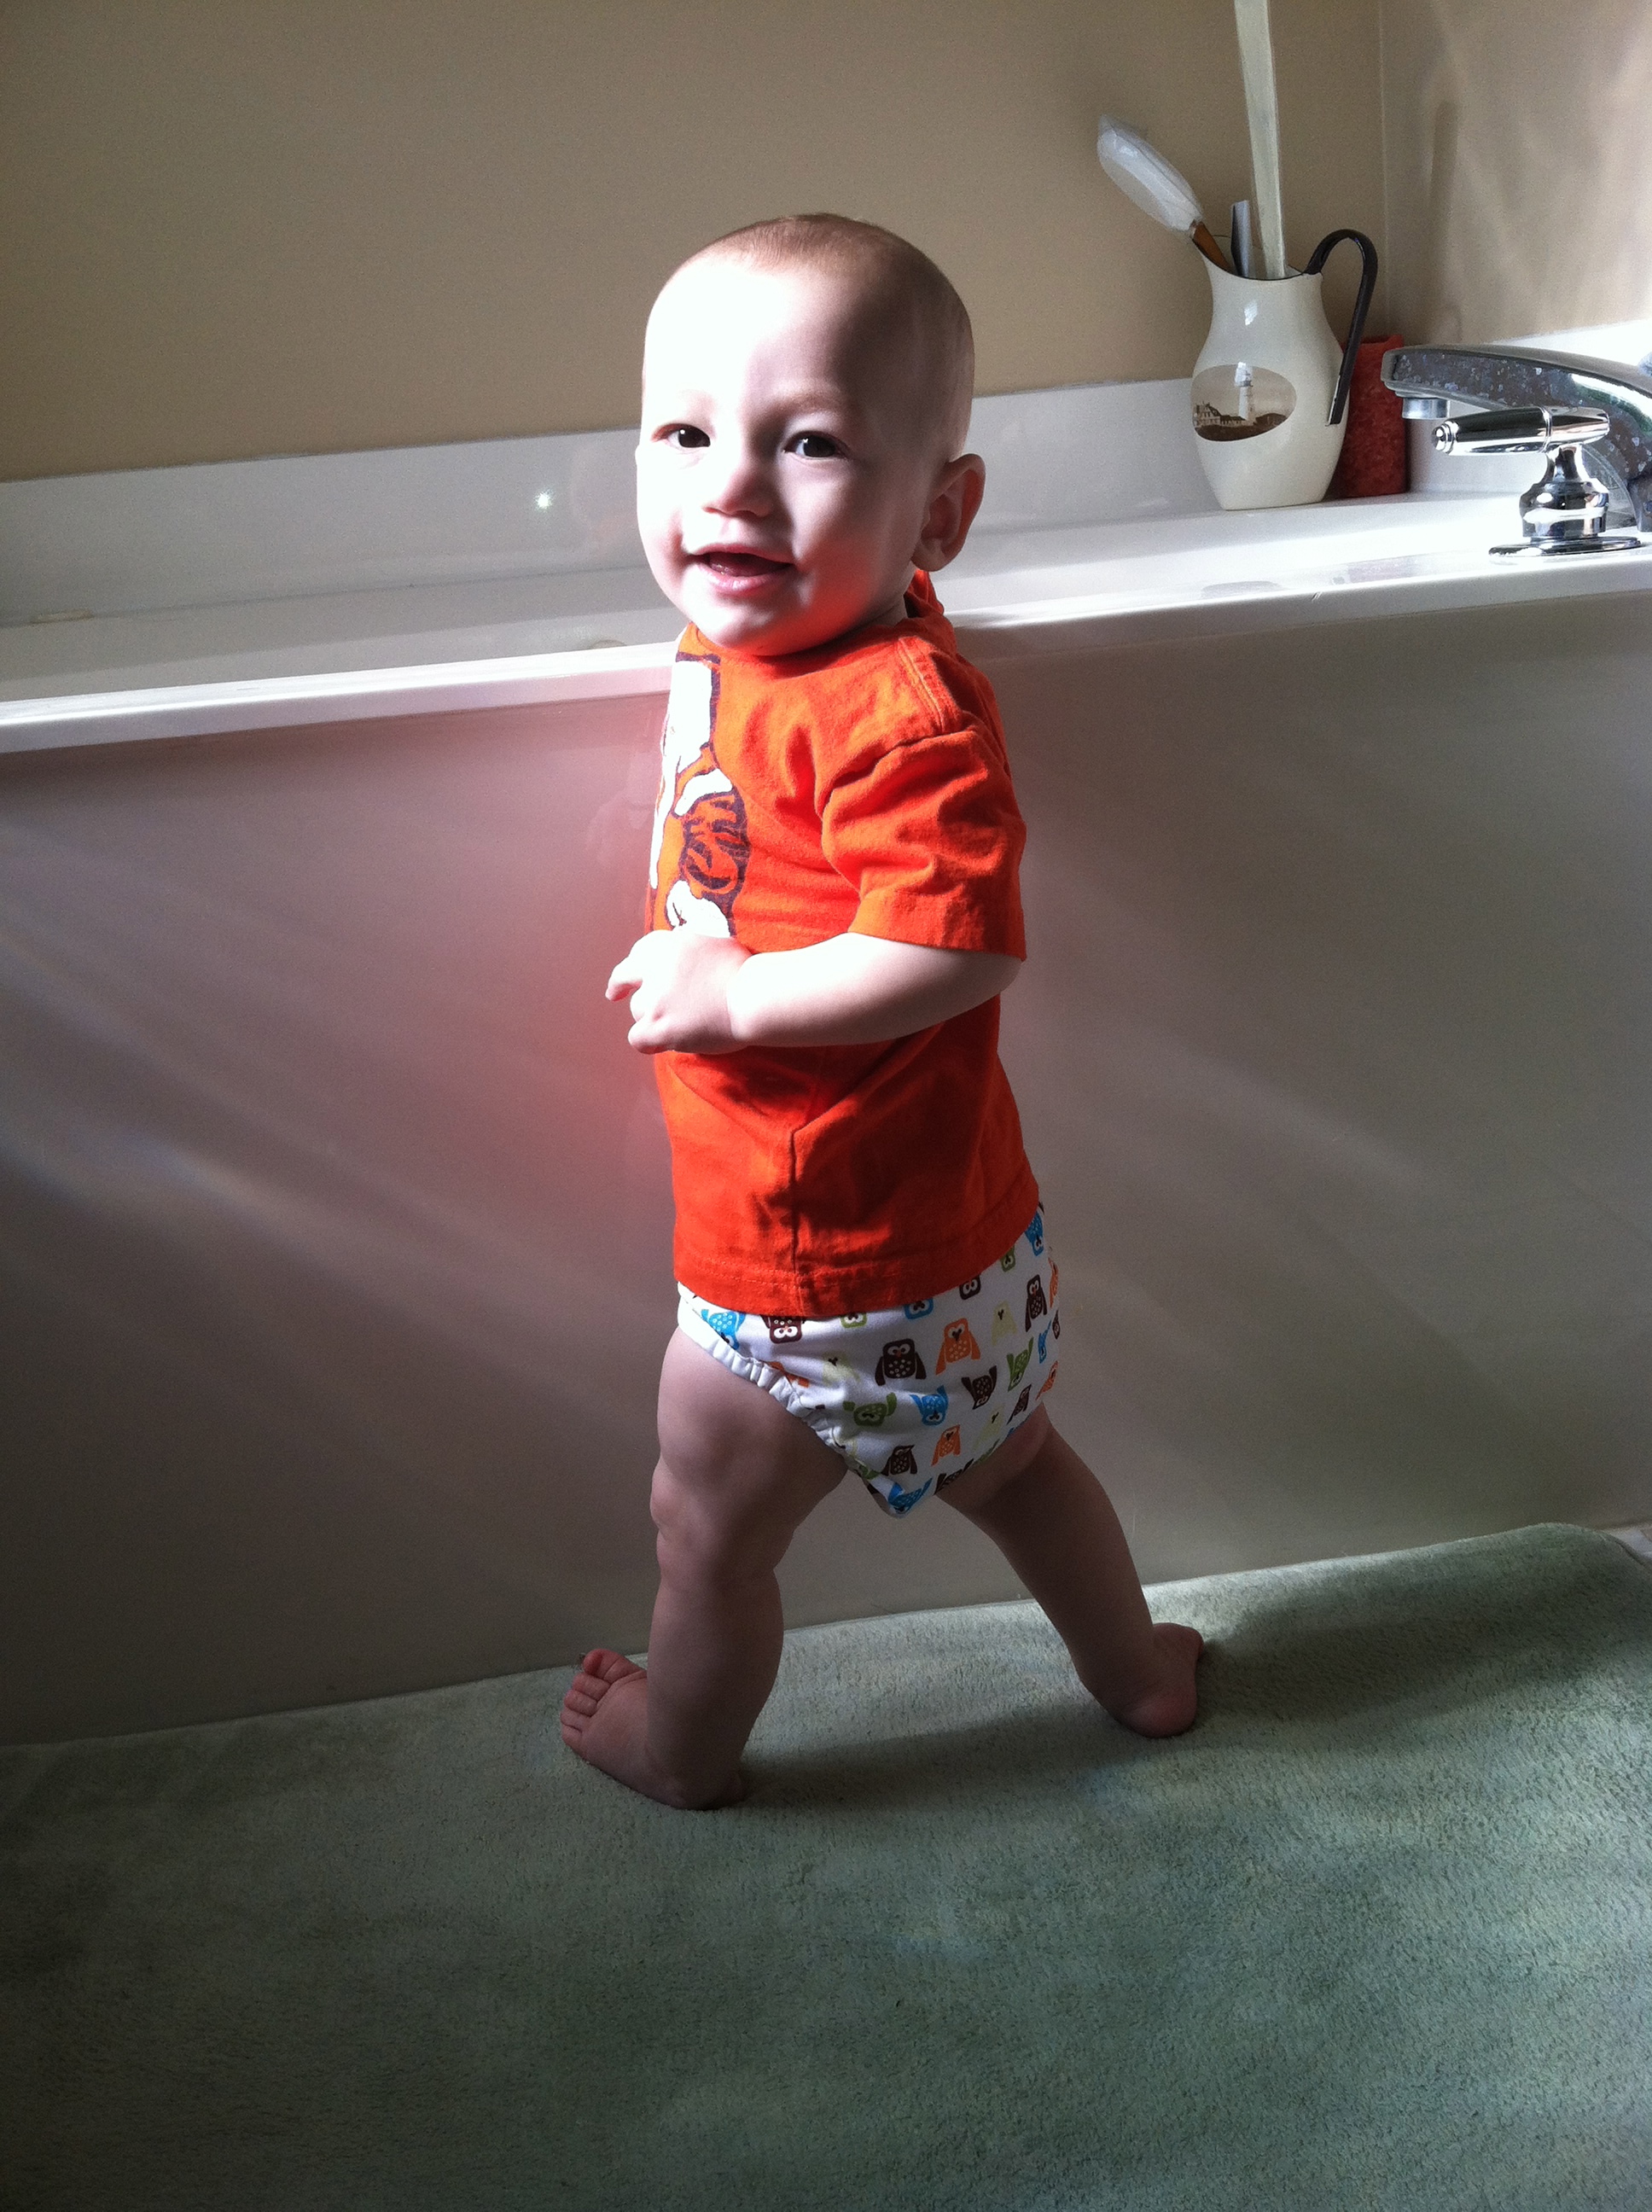
So yesterday, I put my son in a pad and cover in an attempt to gain more confidence in my ability to position everything correctly on my fidgety baby.
I must have done something right, because the diaper held through a 3+ hour nap with no leaks!
So anywho, back to my point…After I changed the soaked pad and laid the cover out to dry, I had an idea…Why not spray the cover with Essante Sanitizer. It’s chemical free, it’s easy, and it will extend the life of my diapers. Sure I could wipe the cover down with a baby wipe, but would I really be getting rid of the germs that can potentially cause odor…or just wiping them around?
Just as I expected, the cover was fresh, dry and ready to be worn again at next diaper change.
Here’s the best part…This stuff is safe enough to spray directly on baby! Works on diaper rash and booboos, helps with ear infections, spray in nose to head off a cold, and it even sanitizes toys, pacifiers, and breast pump parts!
This spray is a mama’s best friend.
Essante Sanitizer
Even as I’m writing this post, I’m chasing my sneezy snotty daughter around spraying it in her nose and on everything she sneezes on. My son scraped his knuckles this morning, Lord only knows how, so he is getting sprayed as well.
Don’t get me wrong, I’m still a huge vinegar lover for household cleaning and disinfecting. I’m just saying there are some things, like my baby’s bottom, that I would prefer not to smell like salt and vinegar chips.
The ingredients in this stuff are simple:
Purified water, stabilized active oxygen, sodium cocoyl glutamate (derived from coconut oil & glutamate amino acid), and sodium bicarbonate (baking soda).
It’s so mild and gentle that I can spray it directly on my son’s diaper rash and eczema flare ups to soothe and prevent infection.
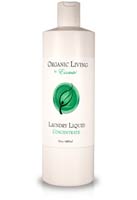
My next secret weapon is Essante Laundry Liquid Concentrate. It is a powerful 100% organic, 100% chemical free, plant-based detergent that loosens & magnetizes dirt away, without weakening fabric. One bottle cleans 32 loads of laundry.
Essante Laundry Liquid Concentrate
This stuff is loaded with only organic and pure ingredients:
As most cloth diapering mamas know, you must be diligent about what you use to wash your baby’s fluff. What could be safer and more effective than nature?
For diapers, I also add a scoop or 1/4 cup of baking soda just to give the diapers that extra bit of freshness. Works like a charm. All our diapers are clean, fresh, and stain free.
Again, my son has very sensitive skin and Essante Laundry Liquid has helped combat his eczema flare ups and has given me one less thing to worry about.
As I’ve mentioned before, I’m in the process of adapting my home to become as green and chemical free as possible. These products are just a few of my baby steps…pun intended.
Happy Baby + Clean Dry Bum = One Less Thing for This Mama to Worry About!
Now it’s your turn. How do you keep your diapers fresh? What are your tips and tricks to extending the life of your cloth?
I have wanted to try cloth diapering since our 1st child was born, but I always feared investing in a product that might turn out not accessible for my limited mobility.
As a southpaw, with no functional use of my right hand or arm, I’ll admit I use my teeth for a lot of things. However, I was NOT willing to use this improvisation with diapering. 😉
Rather, we tried to use organic and compostable diapers when available and decided that cloth diapering may just not be an option for me.
When my daughter reached the potty training stage, we tried Flip Training Pants with cotton inserts, but found that even with snaps, changing the dirty pad, which is velcroed into place at either end, was not easily accessible with one hand.
By the time our son came along, I’d given up on cloth diapering altogether.
However, when my son was about 6 months old, his blowout diapers started to decrease and I began revisiting my cloth options. A fellow crunchy mama advised me on a few options and brands that she’d used and that thought might offer the greatest accessibility. And so the research began…
My initial criteria for selection were Aplix closures, affordability, and availability of “How To” YouTube videos to check out accessibility.
I also didn’t want to have to keep buying diapers as my son grew…like a weed. So sizing options were also important.
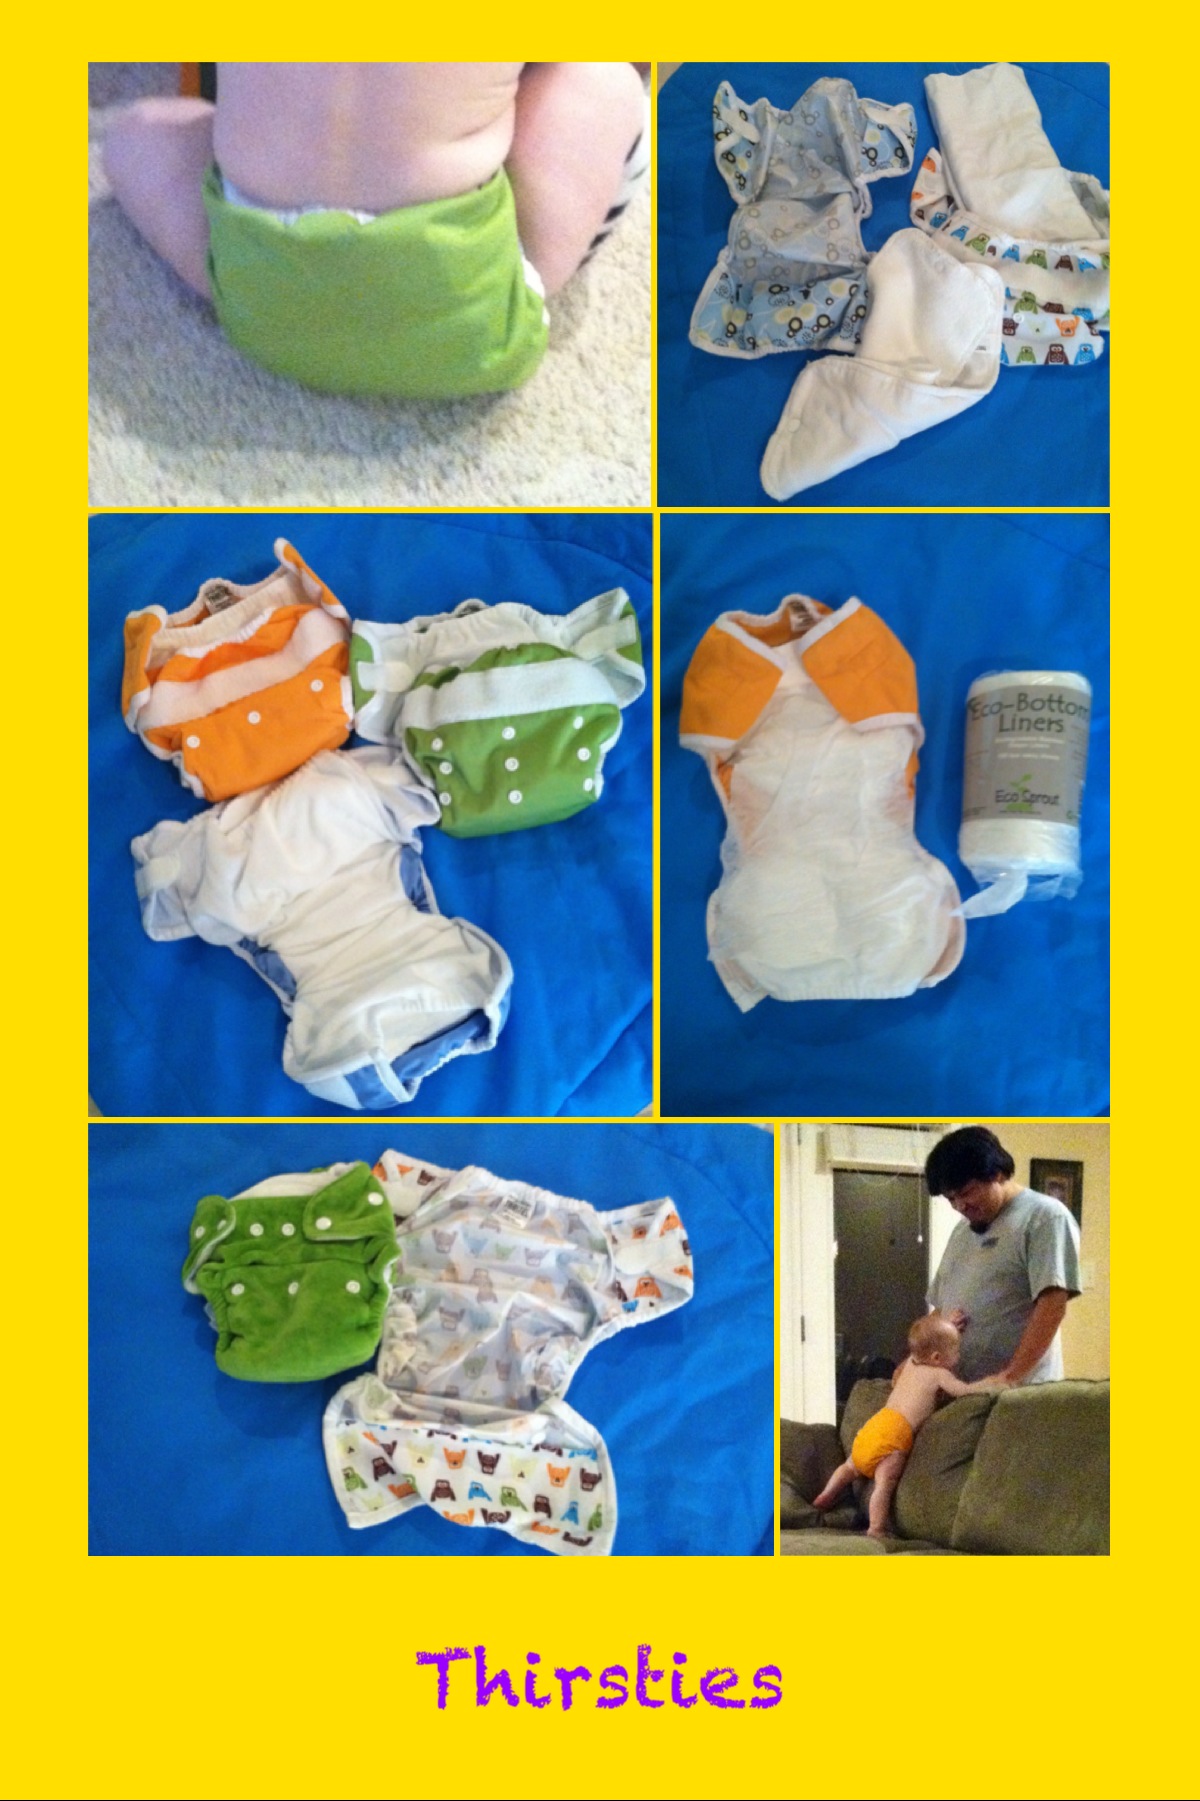
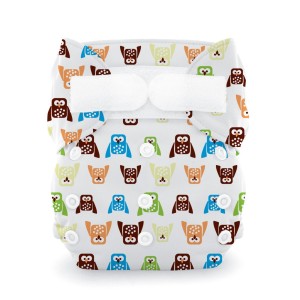
I chose to start with a Thirsties Duo Diaper (a pocket diaper). This diaper was toted as a great starter fluffy for anyone new to cloth diapering because it works much like a disposable.
They are super easy to put on – much like a disposable. Just use and toss in the pail.
Thirsties offers Aplix or snaps on all of their diapers.
All Thirsties have a gusset system to help with leak prevention (with the exception of the Duo AIO which I did not try).
You can stuff extra inserts for added absorbency or easily bulk up near the front for boys or center for girls. As an added accessibility plus, Duo Diapers have a pocket opening in front and back to make stuffing MUCH easier.
Duo Diapers wash and dry fairly easily overall since all the pieces come apart. No added step of taking the icky dirty inserts out. These diapers are designed to agitate the insert out during the wash cycle.
Versatile: Most inserts are interchangeable between brands.
Duo Diapers are easy to hang dry. They air-dry just about as quickly as the dryer cycle itself (especially if you can find a little sun), prolonging their life.
After surviving a few days with the Duo diapers, I thought, “Hey, I can do this! It’s easy!”. So I decided to branch out and experiment with a few other Thirsties combinations.
Next, I tried a Thirsties Duo Wrap with a Stay Dry Duo Insert and/or a Duo Hemp Prefold.
You don’t have to touch the ick with these either. Just remove the diaper and dump the pad in the pail.
The covers are reusable 3-5x. Once you flip out the dirty insert, just allow the cover to dry out until the next change, then pair it with a fresh pad. This is the least expensive option since you need fewer diapers and can wash them less often, prolonging the life of their lifespan.
The wraps air-dry in no time at all (especially if you can find a little sun), prolonging their life. The pads and prefolds can be tossed in the dryer or hung in the sun.
No pairing or stuffing.
Cons:
Because there’s nothing holding the two pieces together, unfortunate shifts may happen while wrangling it onto a wiggly baby.
It’s important to check around the legs and at the back to make sure all the absorbent parts are tucked in or you will have major leakage.
I also had trouble getting the Duo Hemp Prefold “just right” for my OCD self. The Stay Dry Duo Insert was the easiest option for me in this combination. Save the prefolds to use as extra stuffing when needed.
So, how many will you need?
Thirsties recommends the following:
A single Thirsties Duo Wrap or Thirsties Diaper Cover can be wiped clean and reused several times before requiring a full washing.
Newborn-9 months: 1 wrap for every 3 diapers
9 months-18 months: 1 wrap for every 4 diapers
18 months to potty: 1 wrap for 5 every diapers
*Note, I tried this one in a snap because I liked the idea of being to pull it on him rather then putting it on him the old fashioned way.
Pros:
Very easy to put on properly.
Soft and stretchy; seems very comfortable. I was actually able to put this on my wiggly son like a pull-up
Extremely absorbent – will probably be my nighttime fluff if I ever get that brave.
Cover can be reused, prolonging its life as in the category above.
Easy to add extra layers for absorbency.
Can use covers interchangeably between brands.
Covers dry quickly as mentioned above.
Cons:
Two pieces to put on.
Must be careful to tuck all absorbent parts into the cover or wicking/leaks can be a problem. I found this step very accessible and not an issue.
Ick factor. There is no way to avoid touching the wet diaper, as the entire thing (snaps/aplix included) gets soaked. So be prepared to add the extra step of hand washing every time with this one…sanitizer ain’t gonna cut it
These generally take a long time to dry…the tradeoff for their supper absorbency.
So, how many will you need?
Thirsties recommends the following:
Newborn: 20-24 diapers
6-12 months: 14-18 diapers
12-24 months: 12-16 diapers
Potty Learning: 4-8 diapers For the first few months, 1 cover for every 3 diapers changes is the minimum recommendation. Once your baby is 18 months old, you will likely get away with only 1 cover for every 6 diapers in rotation.
Tips
Use a flushable liner to dispose of solid waste for even less ick factor. My favorite brand so far is Eco-Bottom Liners.
Another option is to purchase a diaper sprayer that attaches to the back of the toilet to rinse off solid waste. However, this was not an accessible option for me so I did not try it.
Just like disposable diapers every baby butt is different and what works on my baby may not fit your baby.
My Picks
My #1 pick would have to be pocket diapers for ease of use, accessibility, low ick factor, and very few leaks (may be in part to Thirsties awesome gusset system). Be sure to choose one that offers an opening in front and back for easier stuffing. Also, look for a feature allowing insert to agitate out in the wash so YOU won’t have to touch the ick.
The fitted diaper is a close second for me for cozy factor, less laundry, and increased absorbency all for about the same investment as using pocket diapers. Increased ick factor and dry time make this option my #2 pick…pun only slightly intended. 😉
Overall, I was pleasantly surprised how easy it all was, but it does take commitment.
The cute factor of a fluffy bum almost cancel out the ick factor…almost.
I will continue to use my Thirsties and experiment with new combinations…with all parts being interchangeable, this should keep me entertained until my son potty trains. 🙂
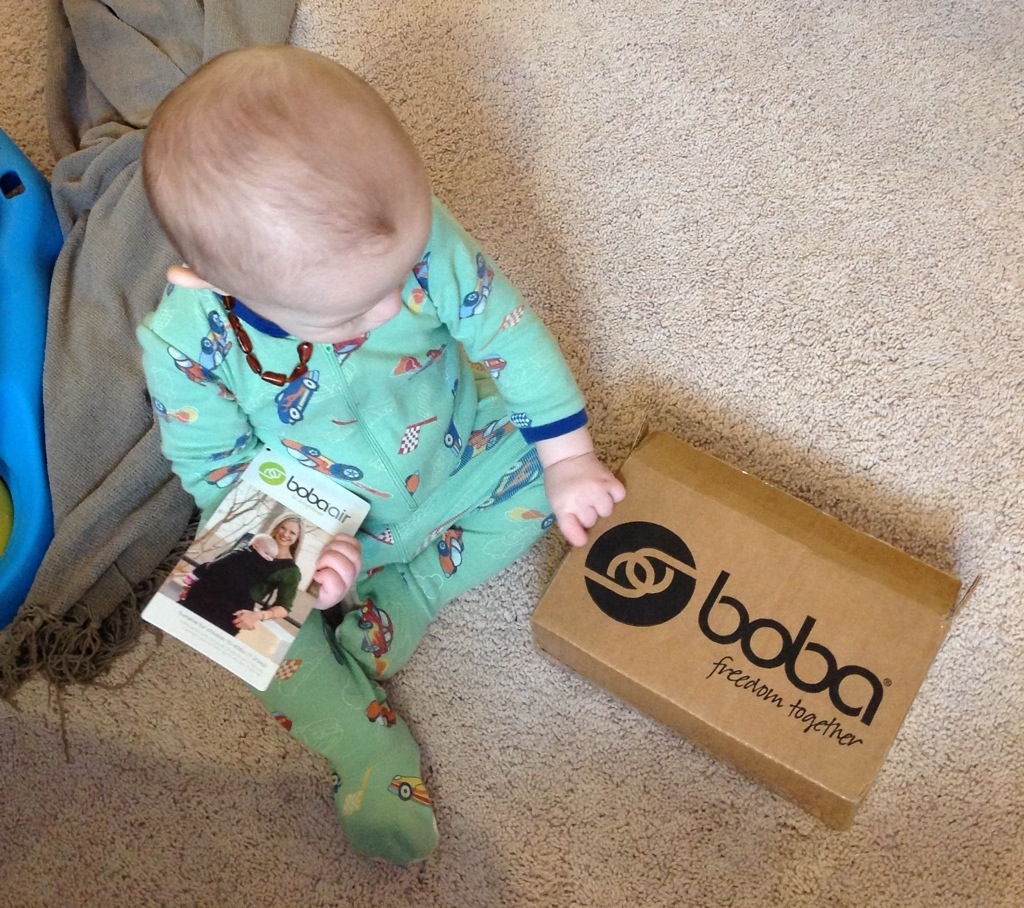
Our Boba Air was delivered yesterday! Yes, it arrived in that tiny little box…a full size buckle carrier! Can you believe it? Stay tuned for a full review next month! The kids and I are so excited to begin our research.
Chase is getting a head start…